賢威8に含まれている基本スタイルの一覧です。
見出し
h1~h6まで見出しのデザインを用意しています。
また、見出しにリンクを付けた場合のデザインもあらかじめ用意されています。
通常の見出し
h1見出しが入ります。
|
1 |
<h1>h1見出しが入ります。</h1> |
h2見出しが入ります。
|
1 |
<h2>h2見出しが入ります。</h2> |
h3見出しが入ります。
|
1 |
<h3>h3見出しが入ります。</h3> |
h4見出しが入ります。
|
1 |
<h4>h4見出しが入ります。</h4> |
h5見出しが入ります。
|
1 |
<h5>h5見出しが入ります。</h5> |
h6見出しが入ります。
|
1 |
<h6>h6見出しが入ります。</h6> |
リンク付きの見出し
|
1 |
<h1><a href="#">h1見出し(リンク)が入ります。</a></h1> |
|
1 |
<h2><a href="#">h2見出し(リンク)が入ります。</a></h2> |
|
1 |
<h3><a href="#">h3見出し(リンク)が入ります。</a></h3> |
|
1 |
<h4><a href="#">h4見出し(リンク)が入ります。</a></h4> |
|
1 |
<h5><a href="#">h5見出し(リンク)が入ります。</a></h5> |
|
1 |
<h6><a href="#">h6見出し(リンク)が入ります。</a></h6> |
装飾を解除した見出し
見出しに画像を利用したい場合など、見出しの装飾をすべてリセットしたい場合もあると思います。
その場合は、見出しにクラス「title_no-style」を入れることでリセットできます。
h2見出し(装飾オフ)が入ります。
|
1 |
<h2 class="title_no-style">h2見出し(装飾オフ)が入ります。</h2> |
h3見出し(装飾オフ)が入ります。
|
1 |
<h3 class="title_no-style">h3見出し(装飾オフ)が入ります。</h3> |
h4見出し(装飾オフ)が入ります。
|
1 |
<h4 class="title_no-style">h4見出し(装飾オフ)が入ります。</h4> |
h5見出し(装飾オフ)が入ります。
|
1 |
<h5 class="title_no-style">h5見出し(装飾オフ)が入ります。</h5> |
h6見出し(装飾オフ)が入ります。
|
1 |
<h6 class="title_no-style">h6見出し(装飾オフ)が入ります。</h6> |
文字サイズ調整
賢威ではあらかじめ文字サイズ(フォントサイズ)を調整するための、汎用のクラスを数多く用意しています。
「small」や「big」で調整する
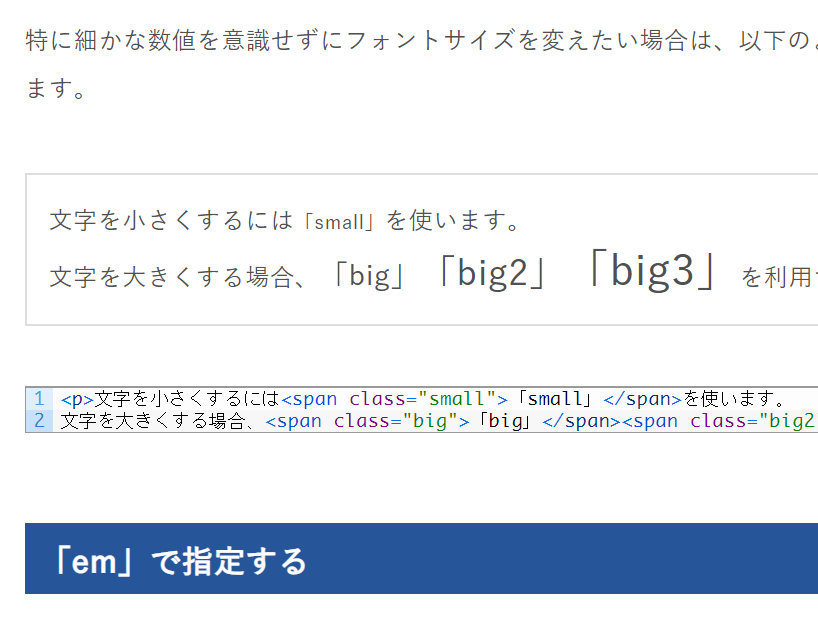
特に細かな数値を意識せずにフォントサイズを変えたい場合は、以下のように「small」や「big」を使います。
文字を小さくするには「small」を使います。
文字を大きくする場合、「big」「big2」「big3」を利用できます。
|
1 2 |
<p>文字を小さくするには<span class="small">「small」</span>を使います。 文字を大きくする場合、<span class="big">「big」</span><span class="big2">「big2」</span><span class="big3">「big3」</span>を利用できます。</p> |
「em」で指定する
そのテキストの通常のサイズを「1」として計算する指定方法です。
かつてはこれが主流でしたので、今でも「em」で指定する人は多いです。
たとえば、賢威のメインのフォントサイズは16pxなので、「1.2em」を指定すれば1.2倍の「19.2px」になります。
※反対に「18px」を指定したい場合などは、「EmChart」などを参考にCSSで「1.125em」と指定する必要があります。
テキストを1.2倍にします。
|
1 |
<p class="f12em">テキストを1.2倍にします。</p> |
賢威のCSSであらかじめ用意している「em」のクラスは次のとおりです。
|
1 2 3 4 5 6 7 8 9 10 11 12 13 14 15 16 17 18 19 20 21 22 23 |
.f08em{ font-size: 0.8em!important; } .f09em{ font-size: 0.9em!important; } .f10em{ font-size: 1.0em!important; } .f11em{ font-size: 1.1em!important; } .f12em{ font-size: 1.2em!important; } .f13em{ font-size: 1.3em!important; } .f14em{ font-size: 1.4em!important; } .f15em{ font-size: 1.5em!important; } .f16em{ font-size: 1.6em!important; } .f17em{ font-size: 1.7em!important; } .f18em{ font-size: 1.8em!important; } .f19em{ font-size: 1.9em!important; } .f20em{ font-size: 2.0em!important; } .f21em{ font-size: 2.1em!important; } .f22em{ font-size: 2.2em!important; } .f23em{ font-size: 2.3em!important; } .f24em{ font-size: 2.4em!important; } .f25em{ font-size: 2.5em!important; } .f26em{ font-size: 2.6em!important; } .f27em{ font-size: 2.7em!important; } .f28em{ font-size: 2.8em!important; } .f29em{ font-size: 2.9em!important; } .f30em{ font-size: 3.0em!important; } |
「rem」で指定する
「rem」は最近利用する人が増えている単位です。
html要素(ルート)のフォントサイズを「1」として、指定するものです。
賢威8では、html要素のフォントサイズを「10px」に指定しているので、16pxに指定したい場合は「1.6rem」とすれば良く、「em」のように複雑な計算をする必要はありません。
反対にhtml要素の数値を変更すれば、全体的に文字サイズを変えることもできるので便利です。
テキストを20pxにします。
|
1 |
<p class="f20rem">テキストを20pxにします。</p> |
あらかじめ用意しているサイズは以下のとおりです。
|
1 2 3 4 5 6 7 8 9 10 11 12 13 14 15 16 17 18 19 20 21 22 23 |
.f08rem{ font-size: 0.8rem!important; } .f09rem{ font-size: 0.9rem!important; } .f10rem{ font-size: 1.0rem!important; } .f11rem{ font-size: 1.1rem!important; } .f12rem{ font-size: 1.2rem!important; } .f13rem{ font-size: 1.3rem!important; } .f14rem{ font-size: 1.4rem!important; } .f15rem{ font-size: 1.5rem!important; } .f16rem{ font-size: 1.6rem!important; } .f17rem{ font-size: 1.7rem!important; } .f18rem{ font-size: 1.8rem!important; } .f19rem{ font-size: 1.9rem!important; } .f20rem{ font-size: 2.0rem!important; } .f21rem{ font-size: 2.1rem!important; } .f22rem{ font-size: 2.2rem!important; } .f23rem{ font-size: 2.3rem!important; } .f24rem{ font-size: 2.4rem!important; } .f25rem{ font-size: 2.5rem!important; } .f26rem{ font-size: 2.6rem!important; } .f27rem{ font-size: 2.7rem!important; } .f28rem{ font-size: 2.8rem!important; } .f29rem{ font-size: 2.9rem!important; } .f30rem{ font-size: 3.0rem!important; } |
「px」で指定する
数値を直接入力でき、非常に分かりやすいのが「px」です。
ただし、「em」や「rem」と違って相対的なサイズではないので、一括でフォントサイズを大きくする、といったことはできません。
テキストを20pxにします。
|
1 |
<p class="f20px">テキストを20pxにします。</p> |
|
1 2 3 4 5 6 7 8 9 10 11 12 13 14 15 |
.f10px{ font-size: 10px!important; } .f11px{ font-size: 11px!important; } .f12px{ font-size: 12px!important; } .f13px{ font-size: 13px!important; } .f14px{ font-size: 14px!important; } .f15px{ font-size: 15px!important; } .f16px{ font-size: 16px!important; } .f17px{ font-size: 17px!important; } .f18px{ font-size: 18px!important; } .f19px{ font-size: 19px!important; } .f20px{ font-size: 20px!important; } .f21px{ font-size: 21px!important; } .f22px{ font-size: 22px!important; } .f23px{ font-size: 23px!important; } .f24px{ font-size: 24px!important; } |
※なお、最近利用されることの多い「vw」「vh」については、扱いが非常に複雑になるため賢威では利用しないようにしています。
文字に色を付ける/マーカーを引く
賢威8ではさまざまな文字装飾用のCSSを用意しています。
文字色
賢威では以下の文字色を用意しています。
文字色を水色に変更することができます。
文字色を赤色に変更することができます。
|
1 2 |
<p class="navy">文字色を紺色に変更することができます。</p> <p class="aqua">文字色を水色に変更することができます。</p><p class="red">文字色を赤色に変更することができます。</p> |
文字色をオレンジ色に変更することができます。
文字色をピンク色に変更することができます。
文字色を紫色に変更することができます。
|
1 2 3 |
<p class="orange">文字色をオレンジ色に変更することができます。</p> <p class="pink">文字色をピンク色に変更することができます。</p> <p class="purple">文字色を紫色に変更することができます。</p> |
文字色を緑色に変更することができます。
|
1 |
<p class="green">文字色を緑色に変更することができます。</p> |
その他の色
文字色を青色に変更することができます。
文字色を黄色に変更することができます。
文字色をオリーブ色に変更することができます。
文字色をライム色に変更することができます。
文字色を黒色に変更することができます。
文字色を灰色に変更することができます。
文字色を白色に変更することができます。
文字色を茶色に変更することができます。
|
1 2 3 4 5 6 7 8 |
<p class="blue">文字色を青色に変更することができます。</p> <p class="yellow">文字色を黄色に変更することができます。</p> <p class="olive">文字色をオリーブ色に変更することができます。</p> <p class="lime">文字色をライム色に変更することができます。</p> <p class="black">文字色を黒色に変更することができます。</p> <p class="gray">文字色を灰色に変更することができます。</p> <p class="white"><span style="background-color: #ccc;">文字色を白色に変更することができます。</span></p> <p class="brown">文字色を茶色に変更することができます。</p> |
マーカー表示
以下は文字の色を変更しませんが、背景にマーカーを引くための装飾です。
文字に黄色の背景色をつけることができます。
文字にオレンジ色の背景色をつけることができます。
文字にピンク色の背景色をつけることができます。
文字に青色の背景色をつけることができます。
文字にライム色の背景色をつけることができます。
文字に灰色の背景色をつけることができます。
|
1 2 3 4 5 6 7 8 |
<div class="data-sample"> <p>文字に<span class="line-yellow">黄色の背景色</span>をつけることができます。</p> <p>文字に<span class="line-orange">オレンジ色の背景色</span>をつけることができます。</p> <p>文字に<span class="line-pink">ピンク色の背景色</span>をつけることができます。</p> <p>文字に<span class="line-blue">青色の背景色</span>をつけることができます。</p> <p>文字に<span class="line-lime">ライム色の背景色</span>をつけることができます。</p> <p>文字に<span class="line-gray">灰色の背景色</span>をつけることができます。</p> </div> |
テキストの装飾
賢威8ではあらかじめ、テキストの装飾に利用できるタグを複数用意してあり、それらを利用することで、「※」を付けたテキストの二行目以降をインデントしたり、傍点を付けたり、リンクに矢印を付けたりすることができます。
太字
テキストを太くします。
太いテキストを元に戻すには「normal」を使います。
|
1 2 |
<p class="b">テキストを太くします。<br> 太いテキストを元に戻すには<span class="normal">「normal」</span>を使います。</p> |
注意書き
※注釈・注記です。最初の一文字だけ飛び出て、それ以降の文字がぶら下がります。注釈・注記です。最初の一文字だけ飛び出て、それ以降の文字がぶら下がります。注釈・注記です。最初の一文字だけ飛び出て、それ以降の文字がぶら下がります。
|
1 |
<p class="note"><small>※注釈・注記です。最初の一文字だけ飛び出て、それ以降の文字がぶら下がります。注釈・注記です。最初の一文字だけ飛び出て、それ以降の文字がぶら下がります。注釈・注記です。最初の一文字だけ飛び出て、それ以降の文字がぶら下がります。</small></p> |
※1 注釈・注記です。最初の一文字だけ飛び出て、それ以降の文字がぶら下がります。注釈・注記です。最初の一文字だけ飛び出て、それ以降の文字がぶら下がります。注釈・注記です。最初の一文字だけ飛び出て、それ以降の文字がぶら下がります。
|
1 |
<p class="note2"><small>※1 注釈・注記です。最初の一文字だけ飛び出て、それ以降の文字がぶら下がります。注釈・注記です。最初の一文字だけ飛び出て、それ以降の文字がぶら下がります。注釈・注記です。最初の一文字だけ飛び出て、それ以降の文字がぶら下がります。</small></p> |
傍点
テキスト上に傍点を打ちます。
|
1 |
<p>テキスト上に<span class="dot">傍</span><span class="dot">点</span>を打ちます。</p> |
※1文字ずつタグで囲う必要があります。
整形済みテキスト
タグで囲まれた部分の改行や空白をそのまま表示します。
|
1 2 3 4 |
整形済み テキスト です。 コードなどを記述する場合は以下のようにcode要素でマークアップします。 <code>コード</code> |
|
1 2 3 4 5 6 |
<pre> 整形済み テキスト です。 コードなどを記述する場合は以下のようにcode要素でマークアップします。 <code><code>コード</code></code> </pre> |
インラインの装飾
em要素
|
1 |
<em>強勢する(アクセントを付ける)箇所を表す</em> |
strong要素
|
1 |
<strong>強い重要性を表す</strong> |
small要素
|
1 |
<small>免責・警告・著作権などの注釈や細目を表す</small> |
s要素
|
1 |
<s>すでに正確ではなくなった内容を表す</s> |
取消線は次のようにして引くこともできます。
取消線を引く
|
1 |
<p class="del">取消線を引く</p> |
abbr要素
|
1 |
<abbr title="HyperText Markup Language">HTML</abbr>等の略語 |
下線
下線を引く
|
1 |
<p class="underline">下線を引く</p> |
リンクの装飾
|
1 2 3 4 5 |
<p class="link-next"><a href="#">アンカーテキストが入ります</a></p> <p class="link-back"><a href="#">アンカーテキストが入ります</a></p> <p class="link-next02"><a href="#">アンカーテキストが入ります</a></p> <p class="link-back02"><a href="#">アンカーテキストが入ります</a></p> |
行間の設定
賢威で行間を指定したい場合、「lhXX」の汎用クラスを利用します。
行間を詰める
(見づらくなってしまいますが)行間を詰めたいとき。行間を詰めたいとき。行間を詰めたいとき。行間を詰めたいとき。行間を詰めたいとき。行間を詰めたいとき。行間を詰めたいとき。
|
1 |
<p class="lh10">(見づらくなってしまいますが)行間を詰めたいとき。行間を詰めたいとき。行間を詰めたいとき。行間を詰めたいとき。行間を詰めたいとき。行間を詰めたいとき。行間を詰めたいとき。</p> |
行間を空ける
行間を空けたいとき。行間を空けたいとき。行間を空けたいとき。行間を空けたいとき。行間を空けたいとき。行間を空けたいとき。行間を空けたいとき。行間を空けたいとき。行間を空けたいとき。
|
1 |
<p class="lh20">行間を空けたいとき。行間を空けたいとき。行間を空けたいとき。行間を空けたいとき。行間を空けたいとき。行間を空けたいとき。行間を空けたいとき。行間を空けたいとき。行間を空けたいとき。</p> |
あらかじめ用意されているCSSは以下です。
|
1 2 3 4 5 6 7 8 9 10 11 |
.lh10{ line-height: 1.0!important; } .lh11{ line-height: 1.1!important; } .lh12{ line-height: 1.2!important; } .lh13{ line-height: 1.3!important; } .lh14{ line-height: 1.4!important; } .lh15{ line-height: 1.5!important; } .lh16{ line-height: 1.6!important; } .lh17{ line-height: 1.7!important; } .lh18{ line-height: 1.8!important; } .lh19{ line-height: 1.9!important; } .lh20{ line-height: 2.0!important; } |
行間の設定
賢威では、クラスを追加するだけで簡単に余白の調整ができるように、あらかじめ多くのクラスが設定されています。
たとえば「m100-b」です。
これは下に「margin」を100px空けるクラスです。
次のサンプルはボックスとボックスの間に100pxのマージを設けたものです。
またボックス内のテキストと枠の間に余白を指定するために「p20」を利用しています。
|
1 2 |
<div class="m100-b p20">「m100-b」を指定したボックス</div> <div class="p20">ボックス</div> |
上記のように、どこか一方にだけ「100px」を追加したい場合は、「m100-t」「m100-r」「m100-b」「m100-l」と指定します。
これは順に上に100px、右に100px、下に100px、左に100pxを意味してます。
また、「m100」なら上下左右に「margin」を100pxを設定できます。
同様に、「p100」は「padding」による余白を意味します。
賢威であらかじめ用意している余白用のクラスを以下に一覧にします。
|
1 2 3 4 5 6 7 8 9 10 11 12 13 14 15 16 17 18 19 20 21 22 23 24 25 26 27 28 29 30 31 32 33 34 35 36 37 38 39 40 41 42 43 44 45 46 47 48 49 50 51 52 53 54 55 56 57 58 59 60 61 62 63 64 65 66 67 68 69 70 71 72 73 74 75 76 77 78 79 80 81 82 83 84 85 86 87 88 89 90 91 92 93 94 95 96 97 98 99 100 101 102 103 104 105 106 107 108 109 110 111 112 113 114 115 116 117 118 119 120 121 122 123 124 125 126 127 128 129 130 131 132 133 134 135 136 137 138 139 140 141 142 143 144 145 146 147 148 149 150 151 152 153 154 155 156 157 158 159 160 161 162 163 164 165 166 167 168 169 170 171 172 173 174 175 176 177 178 179 180 181 182 183 184 185 186 187 188 189 190 191 192 193 194 |
/*周りのブロックからの距離(margin)*/ .m0{ margin: 0!important; }/*周りからのmarginを0に*/ .m0-t{ margin-top: 0!important; }/*上からのmarginを0に*/ .m0-r{ margin-right: 0!important; }/*右からのmarginを0に*/ .m0-b{ margin-bottom: 0!important; }/*下からのmarginを0に*/ .m0-l{ margin-left: 0!important; }/*左からのmarginを0に*/ .m5{ margin: 5px!important; } .m5-t{ margin-top: 5px!important; } .m5-r{ margin-right: 5px!important; } .m5-b{ margin-bottom: 5px!important; } .m5-l{ margin-left: 5px!important; } .m10{ margin: 10px!important; } .m10-t{ margin-top: 10px!important; } .m10-r{ margin-right: 10px!important; } .m10-b{ margin-bottom: 10px!important; } .m10-l{ margin-left: 10px!important; } .m15{ margin: 15px!important; } .m15-t{ margin-top: 15px!important; } .m15-r{ margin-right: 15px!important; } .m15-b{ margin-bottom: 15px!important; } .m15-l{ margin-left: 15px!important; } .m20{ margin: 20px!important; } .m20-t{ margin-top: 20px!important; } .m20-r{ margin-right: 20px!important; } .m20-b{ margin-bottom: 20px!important; } .m20-l{ margin-left: 20px!important; } .m25{ margin: 25px!important; } .m25-t{ margin-top: 25px!important; } .m25-r{ margin-right: 25px!important; } .m25-b{ margin-bottom: 25px!important; } .m25-l{ margin-left: 25px!important; } .m30{ margin: 30px!important; } .m30-t{ margin-top: 30px!important; } .m30-r{ margin-right: 30px!important; } .m30-b{ margin-bottom: 30px!important; } .m30-l{ margin-left: 30px!important; } .m40{ margin: 40px!important; } .m40-t{ margin-top: 40px!important; } .m40-r{ margin-right: 40px!important; } .m40-b{ margin-bottom: 40px!important; } .m40-l{ margin-left: 40px!important; } .m50{ margin: 50px!important; } .m50-t{ margin-top: 50px!important; } .m50-r{ margin-right: 50px!important; } .m50-b{ margin-bottom: 50px!important; } .m50-l{ margin-left: 50px!important; } .m60{ margin: 60px!important; } .m60-t{ margin-top: 60px!important; } .m60-r{ margin-right: 60px!important; } .m60-b{ margin-bottom: 60px!important; } .m60-l{ margin-left: 60px!important; } .m70{ margin: 70px!important; } .m70-t{ margin-top: 70px!important; } .m70-r{ margin-right: 70px!important; } .m70-b{ margin-bottom: 70px!important; } .m70-l{ margin-left: 70px!important; } .m80{ margin: 80px!important; } .m80-t{ margin-top: 80px!important; } .m80-r{ margin-right: 80px!important; } .m80-b{ margin-bottom: 80px!important; } .m80-l{ margin-left: 80px!important; } .m90{ margin: 90px!important; } .m90-t{ margin-top: 90px!important; } .m90-r{ margin-right: 90px!important; } .m90-b{ margin-bottom: 90px!important; } .m90-l{ margin-left: 90px!important; } .m100{ margin: 100px!important; } .m100-t{ margin-top: 100px!important; } .m100-r{ margin-right: 100px!important; } .m100-b{ margin-bottom: 100px!important; } .m100-l{ margin-left: 100px!important; } .m120{ margin: 120px!important; } .m120-t{ margin-top: 120px!important; } .m120-r{ margin-right: 120px!important; } .m120-b{ margin-bottom: 120px!important; } .m120-l{ margin-left: 120px!important; } .m150{ margin: 150px!important; } .m150-t{ margin-top: 150px!important; } .m150-r{ margin-right: 150px!important; } .m150-b{ margin-bottom: 150px!important; } .m150-l{ margin-left: 150px!important; } .m200{ margin: 200px!important; } .m200-t{ margin-top: 200px!important; } .m200-r{ margin-right: 200px!important; } .m200-b{ margin-bottom: 200px!important; } .m200-l{ margin-left: 200px!important; } .m300{ margin: 300px!important; } .m300-t{ margin-top: 300px!important; } .m300-r{ margin-right: 300px!important; } .m300-b{ margin-bottom: 300px!important; } .m300-l{ margin-left: 300px!important; } /*周りのブロックからの距離(padding)*/ .p0{ padding: 0!important; } .p0-t{ padding-top: 0!important; } .p0-r{ padding-right: 0!important; } .p0-b{ padding-bottom: 0!important; } .p0-l{ padding-left: 0!important; } .p5{ padding: 5px!important; } .p5-t{ padding-top: 5px!important; } .p5-r{ padding-right: 5px!important; } .p5-b{ padding-bottom: 5px!important; } .p5-l{ padding-left: 5px!important; } .p10{ padding: 10px!important; } .p10-t{ padding-top: 10px!important; } .p10-r{ padding-right: 10px!important; } .p10-b{ padding-bottom: 10px!important; } .p10-l{ padding-left: 10px!important; } .p15{ padding: 15px!important; } .p15-t{ padding-top: 15px!important; } .p15-r{ padding-right: 15px!important; } .p15-b{ padding-bottom: 15px!important; } .p15-l{ padding-left: 15px!important; } .p20{ padding: 20px!important; } .p20-t{ padding-top: 20px!important; } .p20-r{ padding-right: 20px!important; } .p20-b{ padding-bottom: 20px!important; } .p20-l{ padding-left: 20px!important; } .p25{ padding: 25px!important; } .p25-t{ padding-top: 25px!important; } .p25-r{ padding-right: 25px!important; } .p25-b{ padding-bottom: 25px!important; } .p25-l{ padding-left: 25px!important; } .p30{ padding: 30px!important; } .p30-t{ padding-top: 30px!important; } .p30-r{ padding-right: 30px!important; } .p30-b{ padding-bottom: 30px!important; } .p30-l{ padding-left: 30px!important; } .p40{ padding: 40px!important; } .p40-t{ padding-top: 40px!important; } .p40-r{ padding-right: 40px!important; } .p40-b{ padding-bottom: 40px!important; } .p40-l{ padding-left: 40px!important; } .p50{ padding: 50px!important; } .p50-t{ padding-top: 50px!important; } .p50-r{ padding-right: 50px!important; } .p50-b{ padding-bottom: 50px!important; } .p50-l{ padding-left: 50px!important; } .p60{ padding: 60px!important; } .p60-t{ padding-top: 60px!important; } .p60-r{ padding-right: 60px!important; } .p60-b{ padding-bottom: 60px!important; } .p60-l{ padding-left: 60px!important; } .p70{ padding: 70px!important; } .p70-t{ padding-top: 70px!important; } .p70-r{ padding-right: 70px!important; } .p70-b{ padding-bottom: 70px!important; } .p70-l{ padding-left: 70px!important; } .p80{ padding: 80px!important; } .p80-t{ padding-top: 80px!important; } .p80-r{ padding-right: 80px!important; } .p80-b{ padding-bottom: 80px!important; } .p80-l{ padding-left: 80px!important; } .p90{ padding: 90px!important; } .p90-t{ padding-top: 90px!important; } .p90-r{ padding-right: 90px!important; } .p90-b{ padding-bottom: 90px!important; } .p90-l{ padding-left: 90px!important; } .p100{ padding: 100px!important; } .p100-t{ padding-top: 100px!important; } .p100-r{ padding-right: 100px!important; } .p100-b{ padding-bottom: 100px!important; } .p100-l{ padding-left: 100px!important; } |
なお、レスポンシブでPCでは余白を大きく、モバイルでは余白を小さくしたいときには以下のタグを利用します。
上下の余白のみ対応しているものですが、たとえば「m10-20-t」は上にPCのときは20px、モバイルの時は10px余白をとる、という意味です。
|
1 2 3 4 5 6 7 8 9 10 11 12 13 14 15 16 17 18 19 20 21 22 23 24 25 26 27 28 29 30 31 32 33 34 35 36 37 38 39 40 41 |
/*上下にモバイルとデスクトップで異なるサイズの余白を空ける*/ .m10-20-t{ margin-top: 10px; }/*モバイルのときは10pxでPCのときは20px*/ .m15-30-t{ margin-top: 15px; } .m20-40-t{ margin-top: 20px; } .m25-50-t{ margin-top: 25px; } .m30-60-t{ margin-top: 30px; } .m35-70-t{ margin-top: 35px; } .m40-80-t{ margin-top: 40px; } .m45-90-t{ margin-top: 45px; } .m10-20-b{ margin-bottom: 10px; } .m15-30-b{ margin-bottom: 15px; } .m20-40-b{ margin-bottom: 20px; } .m25-50-b{ margin-bottom: 25px; } .m30-60-b{ margin-bottom: 30px; } .m35-70-b{ margin-bottom: 35px; } .m40-80-b{ margin-bottom: 40px; } .m45-90-b{ margin-bottom: 45px; } @media (min-width : 768px){ /*周りのブロックからの距離(margin)*/ .m10-20-t{ margin-top: 20px!important; } .m15-30-t{ margin-top: 30px!important; } .m20-40-t{ margin-top: 40px!important; } .m25-50-t{ margin-top: 50px!important; } .m30-60-t{ margin-top: 60px!important; } .m35-70-t{ margin-top: 70px!important; } .m40-80-t{ margin-top: 80px!important; } .m45-90-t{ margin-top: 90px!important; } .m10-20-b{ margin-bottom: 20px!important; } .m15-30-b{ margin-bottom: 30px!important; } .m20-40-b{ margin-bottom: 40px!important; } .m25-50-b{ margin-bottom: 50px!important; } .m30-60-b{ margin-bottom: 60px!important; } .m35-70-b{ margin-bottom: 70px!important; } .m40-80-b{ margin-bottom: 80px!important; } .m45-90-b{ margin-bottom: 90px!important; } }/*横幅768px以上*/ |
右寄せ・左寄せ
賢威8でも右寄せ・左寄せなどはこれまで同様に「fl-l」「fl-c」を使って回り込ませたり、テキストなどであれば「al-l」などを利用します。
回り込み
回り込み1
モバイル時にも回り込みは解除されません。

クラスを付けたタグが左側に移動します。
|
1 2 3 4 |
<div class="fl-l"> <img src="./sample006-150x150.jpg" alt="" width="150" height="150" /> </div> クラスを付けたタグが左側に移動します。 |

クラスを付けたタグが右側に移動します。
|
1 2 3 4 |
<div class="fl-r"> <img src="./sample006-150x150.jpg" alt="" width="150" height="150" /> </div> クラスを付けたタグが右側に移動します。 |
回り込み2
モバイル時に回り込みが解除されます。

クラスを付けたタグが左側に移動します。
|
1 2 3 4 |
<div class="left"> <img src="http://demo.keni.jp/wp-content/uploads/2018/09/sample006-150x150.jpg" alt="" width="150" /> </div> クラスを付けたタグが左側に移動します。 |

クラスを付けたタグが右側に移動します。
|
1 2 3 4 |
<div class="right"> <img src="http://demo.keni.jp/wp-content/uploads/2018/09/sample006-150x150.jpg" alt="" width="150" /> </div> クラスを付けたタグが左側に移動します。 |
回り込み3
WordPressが生成するタグです。
モバイル時にも回り込みは解除されません。
 クラスを付けたタグが左側に移動します。
|
1 |
<img src="./sample006-150x150.jpg" alt="" width="150" height="150" class="alignleft" />クラスを付けたタグが左側に移動します。 |
 クラスを付けたタグが右側に移動します。
|
1 |
<img src="./sample006-150x150.jpg" alt="" width="150" height="150" class="alignright" />クラスを付けたタグが右側に移動します。 |
テキストや画像の右寄せ・左寄せ・中央寄せ
テキストの左寄せ
|
1 |
<p class="al-l">テキストの左寄せ</p> |
テキストの右寄せ
|
1 |
<p class="al-r">テキストの右寄せ</p> |
テキストの中央寄せ
|
1 |
<p class="al-c">テキストの中央寄せ</p> |
テキストや画像の上寄せ・下寄せ・中央寄せ
| テキストの上寄せ | テキストの中央寄せ | テキストの下寄せ |
|
1 2 3 4 5 6 7 8 9 10 11 12 13 |
<table> <tr> <td class="vl-t" style="height: 100px;"> テキストの上寄せ </td> <td class="vl-m"> テキストの中央寄せ </td> <td class="vl-b"> テキストの下寄せ </td> </tr> </table> |
リストの装飾
賢威ではシンプルなリストからQ&Aリストまで、様々なリストをご用意しております。
シンプルなリスト
シンプルなリストです。
ul要素
- リストが入ります。
- リストが入ります。長めのリストはこのようなデザインになります。長めのリストはこのようなデザインになります。長めのリストはこのようなデザインになります。
|
1 2 3 4 5 |
<h4>ul要素</h4> <ul> <li>リストが入ります。</li> <li>リストが入ります。長めのリストはこのようなデザインになります。長めのリストはこのようなデザインになります。長めのリストはこのようなデザインになります。</li> </ul> |
ol要素
- リストが入ります。
- リストが入ります。
|
1 2 3 4 |
<ol> <li>リストが入ります。</li> <li>リストが入ります。</li> </ol> |
横並び
リストを横並びにして表示します。
- リストが入ります。
- リストが入ります。
|
1 2 3 4 |
<ul class="inline"> <li>リストが入ります。</li> <li>リストが入ります。</li> </ul> |
リストの先頭に表示するマーカー文字を非表示
- リストが入ります。
- リストが入ります。
|
1 2 3 4 |
<ul class="none"> <li>リストが入ります。</li> <li>リストが入ります。</li> </ul> |
リストのデザインその1
- テキストが入ります。
テキストが入ります。テキストが入ります。テキストが入ります。テキストが入ります。テキストが入ります。
- テキストが入ります。
テキストが入ります。テキストが入ります。テキストが入ります。テキストが入ります。テキストが入ります。
- テキストが入ります。
テキストが入ります。テキストが入ります。テキストが入ります。テキストが入ります。テキストが入ります。
- リスト
- リスト
- リスト
- リスト
- テキストが入ります。
テキストが入ります。テキストが入ります。テキストが入ります。テキストが入ります。テキストが入ります。
|
1 2 3 4 5 6 7 8 9 10 11 12 13 14 15 16 17 18 19 20 21 22 23 24 25 26 27 28 |
<ul class="list_style01"> <li>テキストが入ります。 <div class="list-conts"> <p>テキストが入ります。テキストが入ります。テキストが入ります。テキストが入ります。テキストが入ります。</p> </div> </li> <li>テキストが入ります。 <div class="list-conts"> <p>テキストが入ります。テキストが入ります。テキストが入ります。テキストが入ります。テキストが入ります。</p> </div> </li> <li>テキストが入ります。 <div class="list-conts"> <p>テキストが入ります。テキストが入ります。テキストが入ります。テキストが入ります。テキストが入ります。</p> <ol> <li>リスト</li> <li>リスト</li> <li>リスト</li> <li>リスト</li> </ol> </div> </li> <li>テキストが入ります。 <div class="list-conts"> <p>テキストが入ります。テキストが入ります。テキストが入ります。テキストが入ります。テキストが入ります。</p> </div> </li> </ul> |
リストのデザインその2
- テキストが入ります。テキストが入ります。テキストが入ります。テキストが入ります。テキストが入ります。テキストが入ります。テキストが入ります。
- テキストが入ります。
- テキストが入ります。
- テキストが入ります。
- テキストが入ります。
- テキストが入ります。
- テキストが入ります。
- テキストが入ります。
- テキストが入ります。
- テキストが入ります。
|
1 2 3 4 5 6 7 8 9 10 11 12 |
<ol class="list_style02"> <li>テキストが入ります。テキストが入ります。テキストが入ります。テキストが入ります。テキストが入ります。テキストが入ります。テキストが入ります。</li> <li>テキストが入ります。</li> <li>テキストが入ります。</li> <li>テキストが入ります。</li> <li>テキストが入ります。</li> <li>テキストが入ります。</li> <li>テキストが入ります。</li> <li>テキストが入ります。</li> <li>テキストが入ります。</li> <li>テキストが入ります。</li> </ol> |
チェックリスト
- チェックリストの項目が入ります。チェックリストの項目が入ります。
- チェックリストの項目が入ります。チェックリストの項目が入ります。チェックリストの項目が入ります。チェックリストの項目が入ります。チェックリストの項目が入ります。チェックリストの項目が入ります。
- チェックリストの項目が入ります。チェックリストの項目が入ります。
- チェックリストの項目が入ります。チェックリストの項目が入ります。
- チェックリストの項目が入ります。チェックリストの項目が入ります。
|
1 2 3 4 5 6 7 |
<ul class="check-list"> <li>チェックリストの項目が入ります。チェックリストの項目が入ります。</li> <li>チェックリストの項目が入ります。チェックリストの項目が入ります。チェックリストの項目が入ります。チェックリストの項目が入ります。チェックリストの項目が入ります。チェックリストの項目が入ります。</li> <li>チェックリストの項目が入ります。チェックリストの項目が入ります。</li> <li>チェックリストの項目が入ります。チェックリストの項目が入ります。</li> <li>チェックリストの項目が入ります。チェックリストの項目が入ります。</li> </ul> |
記述リスト(旧定義リスト)
「定義リスト(definition list)」は、html5では「記述リスト(description list)」と改められました。
- dt要素
- dd要素dd要素dd要素dd要素
|
1 2 3 4 |
<dl> <dt>dt要素</dt> <dd>dd要素dd要素dd要素dd要素</dd> </dl> |
定義リストとして使用する場合
- dt要素とdfn要素で用語をマークアップ
- dd要素に定義を記述します。
|
1 2 3 4 |
<dl> <dt><dfn>dt要素とdfn要素で用語をマークアップ</dfn></dt> <dd>dd要素に定義を記述します。</dd> </dl> |
記述リストのデザインその1
- 記述リストのデザインその1
- 要素が横に並びます。モバイルなどでは、横並びが解除されます。また
左よりも右の文字数の方が少なくなるとデザインが崩れます。 - 記述リストのデザインその1
- 要素が横に並びます。モバイルなどでは、横並びが解除されます。また
左よりも右の文字数の方が少なくなるとデザインが崩れます。 - 記述リストのデザインその1
- 要素が横に並びます。モバイルなどでは、横並びが解除されます。また
左よりも右の文字数の方が少なくなるとデザインが崩れます。
|
1 2 3 4 5 6 7 8 9 10 11 |
<dl class="dl_style01"> <dt>記述リストのデザインその1</dt> <dd>要素が横に並びます。モバイルなどでは、横並びが解除されます。また 左よりも右の文字数の方が少なくなるとデザインが崩れます。</dd> <dt>記述リストのデザインその1</dt> <dd>要素が横に並びます。モバイルなどでは、横並びが解除されます。また 左よりも右の文字数の方が少なくなるとデザインが崩れます。</dd> <dt>記述リストのデザインその1</dt> <dd>要素が横に並びます。モバイルなどでは、横並びが解除されます。また 左よりも右の文字数の方が少なくなるとデザインが崩れます。</dd> </dl> |
記述リストのデザインその2
- 記述リストのデザインその2
- 要素が縦に並びます。
- 記述リストのデザインその2
- 要素が縦に並びます。
- 記述リストのデザインその2
- 要素が縦に並びます。
|
1 2 3 4 5 6 7 8 |
<dl class="dl_style02"> <dt>記述リストのデザインその2</dt> <dd>要素が縦に並びます。</dd> <dt>記述リストのデザインその2</dt> <dd>要素が縦に並びます。</dd> <dt>記述リストのデザインその2</dt> <dd>要素が縦に並びます。</dd> </dl> |
Q&Aリスト
- ここには質問文が入ります。
- ここには回答文が入りますここには回答文が入りますここには回答文が入ります。
ここには回答文が入ります。
ここには回答文が入りますここには回答文が入りますここには回答文が入りますここには回答文が入ります。 - ここには質問文が入ります。
- ここには回答文が入りますここには回答文が入りますここには回答文が入ります。
ここには回答文が入ります。
ここには回答文が入りますここには回答文が入りますここには回答文が入りますここには回答文が入ります。
|
1 2 3 4 5 6 7 8 9 10 11 |
<dl class="qa-list"> <dt>ここには質問文が入ります。</dt> <dd>ここには回答文が入りますここには回答文が入りますここには回答文が入ります。<br> ここには回答文が入ります。<br> ここには回答文が入りますここには回答文が入りますここには回答文が入りますここには回答文が入ります。</dd> <dt>ここには質問文が入ります。</dt> <dd>ここには回答文が入りますここには回答文が入りますここには回答文が入ります。<br> ここには回答文が入ります。<br> ここには回答文が入りますここには回答文が入りますここには回答文が入りますここには回答文が入ります。</dd> </dl> |
アコーディオン
- ここには質問文が入ります。
- ここには回答文が入りますここには回答文が入りますここには回答文が入ります。
ここには回答文が入ります。
ここには回答文が入りますここには回答文が入りますここには回答文が入りますここには回答文が入ります。 - ここには質問文が入ります。
- ここには回答文が入りますここには回答文が入りますここには回答文が入ります。
ここには回答文が入ります。
ここには回答文が入りますここには回答文が入りますここには回答文が入りますここには回答文が入ります。
|
1 2 3 4 5 6 7 8 9 10 11 |
<dl class="qa-list accordion-list"> <dt class="accordion-list_btn">ここには質問文が入ります。</dt> <dd class="accordion-list_cont">ここには回答文が入りますここには回答文が入りますここには回答文が入ります。<br> ここには回答文が入ります。<br> ここには回答文が入りますここには回答文が入りますここには回答文が入りますここには回答文が入ります。</dd> <dt class="accordion-list_btn">ここには質問文が入ります。</dt> <dd class="accordion-list_cont">ここには回答文が入りますここには回答文が入りますここには回答文が入ります。<br> ここには回答文が入ります。<br> ここには回答文が入りますここには回答文が入りますここには回答文が入りますここには回答文が入ります。</dd> </dl> |
ボタンのデザイン
賢威8ではコンバージョン用のボタンとして以下の6種類をあらかじめご用意しています。
|
1 2 3 |
<div class="al-c m20"> <a href="#" class="btn dir-arw_r btn_orange"><span class="icon_arrow_s_right"></span>送信内容を確認する</a> </div> |
|
1 2 3 |
<div class="al-c m20"> <a href="#" class="btn dir-arw_r btn_bluegreen"><span class="icon_arrow_s_right"></span>送信内容を確認する</a> </div> |
|
1 2 3 |
<div class="al-c m20"> <a href="#" class="btn dir-arw_r btn_gray"><span class="icon_arrow_s_right"></span>送信内容を確認する</a> </div> |
|
1 2 3 |
<div class="al-c m20"> <a href="#" class="btn dir-arw_r btn_style03"><span class="icon_arrow_s_right"></span>送信内容を確認する</a> </div> |
|
1 2 3 |
<div class="al-c m20"> <a href="#" class="btn dir-arw_r btn_style01"><span class="icon_arrow_s_right"></span>送信内容を確認する</a> </div> |
|
1 2 3 |
<div class="al-c m20"> <a href="#" class="btn dir-arw_r btn btn_style02"><span class="icon_arrow_s_right"></span>送信内容を確認する</a> </div> |
なお、矢印を逆にしたい場合は「dir-arw_r」を「dir-arw_l」に、「icon_arrow_s_right」を「icon_arrow_s_left」にします。
また、賢威のアイコンを利用して以下のようにすることも可能です。
|
1 2 3 |
<div class="al-c m20"> <a href="#" class="btn btn_orange"><span class="icon_mail white"></span> 送信する</a> </div> |
|
1 2 3 |
<div class="al-c m20"> <a href="#" class="btn btn_gray"><span class="icon_caution yellow"></span> 必須項目が入力されていません。</a> </div> |
SNSボタン
賢威8では決められたタグを設置することで簡単にSNSボタンを表示できます。
|
1 2 3 4 5 |
<aside class="sns-btn_wrap"> <div class="sns-btn_tw"></div> <div class="sns-btn_fb"></div> <div class="sns-btn_hatena"></div> </aside> |
それぞれのタグは以下のように対応していて、特定のボタンを削除するには上記のタグから対応する<div class=”sns-btn_XX”></div>を削除するだけです。
- 「sns-btn_tw」:Twitter
- 「sns-btn_fb」:Fcebook
- 「sns-btn_hatena」:はてなブックマーク
また、SNSボタンではFacebook、はてなブックマークで数値を取得していますが、これは基本的にそのボタンが置かれているページの値がそのまま利用されています。
※Twitterなど数値を取得できないものは代わりのテキストを設置しています。
もし、ボタンが置かれているページとは別のページの値を取得したり、シェアできるようにしたい場合は、以下のようにHTMLタグに「data-url属性」と「data-title属性」を設置して、取得したいページのURLとタイトルを記述します。
次のものは「http://www.cpi.ad.jp/bourne-writing/」を指定してみた例です。
|
1 2 3 4 5 |
<div class="show-sample"><aside class="sns-btn_wrap p0-b"> <div class="sns-btn_tw" data-url="http://www.cpi.ad.jp/bourne-writing/" data-title="沈黙のWebライティング - Webマーケッター ボーンの激闘 -"></div> <div class="sns-btn_fb" data-url="http://www.cpi.ad.jp/bourne-writing/" data-title="沈黙のWebライティング - Webマーケッター ボーンの激闘 -"></div> <div class="sns-btn_hatena" data-url="http://www.cpi.ad.jp/bourne-writing/" data-title="沈黙のWebライティング - Webマーケッター ボーンの激闘 -"></div> </aside></div> |
アイコンリスト
賢威8ではワンポイントで利用できるアイコンをいくつか用意しています。
この画像はウェブフォントとして表示していますので、以下のようにHTMLタグを置いて表示します。
- ポイント
- 注意
- 別ウインドウ
- 矢印上
- 矢印右
- 矢印下
- 矢印左
- ダウンロード
- ZIP
- メール
- ショッピングカート
- 虫眼鏡
- ホーム
- フォルダ
- 時計
- カレンダー
- ビル
- マップ
- NEW
- 初心者マーク
|
1 2 3 4 5 6 7 8 9 10 11 12 13 14 15 16 17 18 19 20 21 22 23 24 25 26 27 28 29 30 31 32 33 34 35 36 37 38 39 40 41 |
<span class="icon_point color01"></span> ポイント <span class="icon_caution color01"></span> 注意 <span class="icon_blank color01"></span> 別ウインドウ <span class="icon_arrow_up color01"></span> 矢印上 <span class="icon_arrow_right color01"></span> 矢印右 <span class="icon_arrow_down color01"></span> 矢印下 <span class="icon_arrow_left color01"></span> 矢印左 <span class="icon_download color01"></span> ダウンロード <span class="icon_pdf color01"></span> PDF <span class="icon_zip color01"></span> ZIP <span class="icon_mail color01"></span> メール <span class="icon_cart color01"></span> ショッピングカート <span class="icon_search color01"></span> 虫眼鏡 <span class="icon_home color01"></span> ホーム <span class="icon_folder color01"></span> フォルダ <span class="icon_time color01"></span> 時計 <span class="icon_calendar color01"></span> カレンダー <span class="icon_building color01"></span> ビル <span class="icon_map color01"></span> マップ <span class="icon_new color01"></span> NEW <span class="icon_beginner color01"></span> 初心者マーク |
なお、上記について、アイコンの色はテーマの基本色を指定するために「color01」としていますが、「red」などに置き換えて色を変えることができます。
虫眼鏡
|
1 2 3 |
<span class="icon_point red"></span> ポイント <span class="icon_search aqua"></span> 虫眼鏡 |
引用エリア
引用エリアの装飾です。
引用元の表記などもあらかじめスタイルが用意されています。
blockquote要素
ここに引用文が入ります。ここに引用文が入ります。ここに引用文が入ります。ここに引用文が入ります。ここに引用文が入ります。
ここに引用文が入ります。ここに引用文が入ります。ここに引用文が入ります。ここに引用文が入ります。ここに引用文が入ります。
ここに引用文が入ります。ここに引用文が入ります。ここに引用文が入ります。ここに引用文が入ります。ここに引用文が入ります。
ここに引用文が入ります。ここに引用文が入ります。引用元: 参照記事のタイトル
|
1 2 3 4 5 6 7 |
<blockquote> <p>ここに引用文が入ります。ここに引用文が入ります。ここに引用文が入ります。ここに引用文が入ります。ここに引用文が入ります。<br> ここに引用文が入ります。ここに引用文が入ります。ここに引用文が入ります。ここに引用文が入ります。ここに引用文が入ります。<br> ここに引用文が入ります。ここに引用文が入ります。ここに引用文が入ります。ここに引用文が入ります。ここに引用文が入ります。<br> ここに引用文が入ります。ここに引用文が入ります。</p> <p class="link-ref">引用元: <cite><a class="outbound" href="#" target="_blank">参照記事のタイトル</a></cite></p> </blockquote> |
上記コードの「href=”#”」の#部分を引用元のURLに変え、「参照記事のタイトル」を部分を引用元ページのタイトルに変更してご使用ください。
q要素
ここにテキストが入りますここにテキストが入りますここにテキストが入りますここにテキストが入りますここにテキストが入りますここにテキストが入ります。
ここにテキストが入りますここにテキストが入ります。
ここにテキストが入ります文中に出てくる短文の引用部分への装飾です
ここにテキストが入りますここにテキストが入りますここにテキストが入りますここにテキストが入りますここにテキストが入ります。
|
1 2 3 |
<p>ここにテキストが入りますここにテキストが入りますここにテキストが入りますここにテキストが入りますここにテキストが入りますここにテキストが入ります。<br> ここにテキストが入りますここにテキストが入ります。<br> ここにテキストが入ります<q>文中に出てくる短文の引用部分への装飾です</q>ここにテキストが入りますここにテキストが入りますここにテキストが入りますここにテキストが入りますここにテキストが入ります。</p> |
テーブル
賢威8では、初期段階でいくつかのテーブル用のデザインを用意しています。
次のものは標準のテーブルです。
| 見出し1 | テーブルデータ1 |
|---|---|
| 見出し2 | テーブルデータ2 |
| 見出し3 | テーブルデータ3 |
|
1 2 3 4 5 6 7 8 9 10 11 12 13 14 15 16 |
<table> <tbody> <tr> <th>見出し1</th> <td>テーブルデータ1</td> </tr> <tr> <th>見出し2</th> <td>テーブルデータ2</td> </tr> <tr> <th>見出し3</th> <td>テーブルデータ3</td> </tr> </tbody> </table> |
「見出し1、2、3(thタグ)」の横幅の設定などは、汎用クラスの「w15」等を使うと便利です。
| 見出し1 | テーブルデータ1 |
|---|---|
| 見出し2 | テーブルデータ2 |
| 見出し3 | テーブルデータ3 |
|
1 2 3 4 5 6 7 8 9 10 11 12 13 14 15 16 |
<table> <tbody> <tr> <th class="w15">見出し1</th> <td>テーブルデータ1</td> </tr> <tr> <th>見出し2</th> <td>テーブルデータ2</td> </tr> <tr> <th>見出し3</th> <td>テーブルデータ3</td> </tr> </tbody> </table> |
以下はレスポンシブ用のテーブルです。
1つ目はモバイルで見たときに見出しとデータ部分がたてに並ぶデザインサンプルです。
classに「table-block」を指定します。
| 見出し1 | テーブルデータ1 |
|---|---|
| 見出し2 | テーブルデータ2 |
| 見出し3 | テーブルデータ3 |
|
1 2 3 4 5 6 7 8 9 10 11 12 13 14 15 16 |
<table class="table-block"> <tbody> <tr> <th>見出し1</th> <td>テーブルデータ1</td> </tr> <tr> <th>見出し2</th> <td>テーブルデータ2</td> </tr> <tr> <th>見出し3</th> <td>テーブルデータ3</td> </tr> </tbody> </table> |
2つ目はモバイルで見ると、見出し部分が非表示となり、テーブルデータの横に見出しが表示されるようになるものです。
<th>に設定している見出しの内容と<td>に設定しているdata-th属性を一致させるかたちで実現しています。
| 見出し1 | 見出し2 | 見出し3 |
|---|---|---|
| テーブルデータ1-1 | テーブルデータ1-2 | テーブルデータ1-3 |
| テーブルデータ2-1 | テーブルデータ2-2 | テーブルデータ2-3 |
| テーブルデータ3-1 | テーブルデータ3-2 | テーブルデータ3-3 |
|
1 2 3 4 5 6 7 8 9 10 11 12 13 14 15 16 17 18 19 20 21 22 23 24 25 26 |
<table class="table-list"> <thead> <tr> <th>見出し1</th> <th>見出し2</th> <th>見出し3</th> </tr> </thead> <tbody> <tr> <td data-th="見出し1">テーブルデータ1-1</td> <td data-th="見出し2">テーブルデータ1-2</td> <td data-th="見出し3">テーブルデータ1-3</td> </tr> <tr> <td data-th="見出し1">テーブルデータ2-1</td> <td data-th="見出し2">テーブルデータ2-2</td> <td data-th="見出し3">テーブルデータ2-3</td> </tr> <tr> <td data-th="見出し1">テーブルデータ3-1</td> <td data-th="見出し2">テーブルデータ3-2</td> <td data-th="見出し3">テーブルデータ3-3</td> </tr> </tbody> </table> |
3つ目はモバイルで見た時もPCと同じように表示し、はみ出る部分をスライドすることで確認できるようにするスタイルです。
tableを<div class=”table-scroll”></div>で括ります。
| 項目名 | 項目名 | |
|---|---|---|
| 項目名が入ります | 項目内容 | 項目内容 |
| 項目名が入ります | 項目内容 | 項目内容 |
| 項目名が入ります | 項目内容 | 項目内容 |
|
1 2 3 4 5 6 7 8 9 10 11 12 13 14 15 16 17 18 19 20 21 22 23 24 25 26 27 28 |
<div class="table-scroll"> <table style="width: 500px;"> <thead> <tr> <th></th> <th>項目名</th> <th>項目名</th> </tr> </thead> <tbody> <tr> <th>項目名が入ります</th> <td>項目内容</td> <td>項目内容</td> </tr> <tr> <th>項目名が入ります</th> <td>項目内容</td> <td>項目内容</td> </tr> <tr> <th>項目名が入ります</th> <td>項目内容</td> <td>項目内容</td> </tr> </tbody> </table><!--標準のテーブル--> </div><!--はみ出した分横にスクロールするスタイル--> |
なお、テーブルの初期デザインは、以下のクラスを追加することで(ある程度)解除することが可能です。
テーブルに装飾を入れたくない場合に利用してください。
| 見出し1 | テーブルデータ1 |
|---|---|
| 見出し2 | テーブルデータ2 |
| 見出し3 | テーブルデータ3 |
|
1 2 3 4 5 6 7 8 9 10 11 12 13 14 15 16 |
<table> <tbody class="table_no-style"> <tr> <th>見出し1</th> <td>テーブルデータ1</td> </tr> <tr> <th>見出し2</th> <td>テーブルデータ2</td> </tr> <tr> <th>見出し3</th> <td>テーブルデータ3</td> </tr> </tbody> </table> |
画像の装飾
画像を装飾するためのスタイル一覧をご紹介します。
画像に限らず、ボックスの枠などにも適用できると思います。
なお、以下の画像はファイル名の末尾を「_off.jpg」にしています。
末尾を「_off.jpg」にしておき、別に末尾を「_on.jpg」にした画像を設置しておくと、マウスオーバーで画像が置き換わるようになっています。
影付き
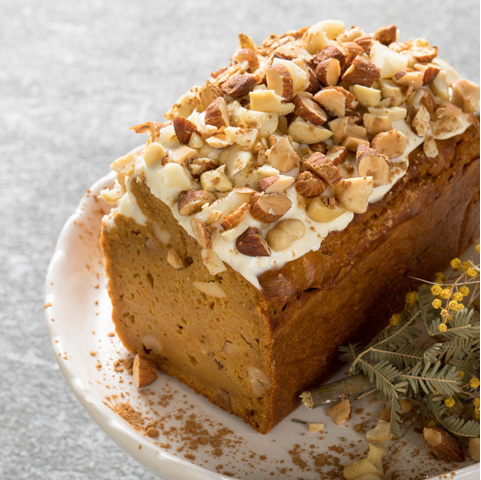
imgタグにクラス「shadow」を追加します。
|
1 2 3 |
<figure> <img class="shadow" src="./images/sample012_off.jpg" alt="サンプル" width="240" height="240"> </figure> |
影付き2
imgタグにクラス「shadow02」を追加します。

|
1 2 3 |
<figure> <img class="shadow02" src="./images/sample012_off.jpg" alt="サンプル" width="240" height="240"> </figure> |
囲み線(1px)
imgタグにクラス「outline」を追加します。

|
1 2 3 |
<figure> <img class="outline" src="./images/sample012_off.jpg" alt="サンプル" width="240" height="240"> </figure> |
角丸
imgタグにクラス「rc12」を追加します。
ほかにも「rc4」「rc8」があらかじめ用意されています。

|
1 2 3 |
<figure> <img class="rc12" src="./images/sample012_off.jpg" alt="サンプル" width="240" height="240"> </figure> |
円
imgタグにクラス「circle」を追加します。

|
1 2 3 |
<figure> <img class="circle" src="./images/sample012_off.jpg" alt="サンプル" width="240" height="240"> </figure> |
写真風
imgタグにクラス「frame」を追加します。

|
1 2 3 4 |
<figure> <img class="frame" src="./images/sample012_off.jpg" alt="サンプル" width="240" height="240"> <figcaption class="al-c m10-t">写真風</figcaption> </figure> |
装飾を複数適用する
また上記の装飾を複数同時に適用する場合は、class名の後に半角スペースを入れて、もう一つの付けたい装飾のclass名を入れてください。例えば、影と角丸を適用する場合は「img class=”shadow rc12″」と入れてください。

|
1 2 3 4 |
<figure> <img class="shadow rc12" src="./images/sample012_off.jpg" alt="サンプル" width="240" height="240"> <figcaption class="al-c m10-t">写真風</figcaption> </figure> |
装飾ボックス
賢威8ではコンテンツを区切るための装飾ボックスをあらかじめ15種類ほど用意しております。
賢威8WordPress版をお使いの方はビジュアルエディターにある「ボックス」からその一部を利用することができます。
ただし一部のみですので、ビジュアルエディターから選択できないボックスについては、下記サンプルコードをテキストエディターに貼り付けてご使用ください。
青斜線の装飾ボックスです。ここにテキストが入ります。
|
1 2 3 4 5 |
<div class="box_style box_style01"> <div class="box_inner"> <p>青斜線の装飾ボックスです。ここにテキストが入ります。</p> </div> </div> |
黒斜線の装飾ボックスです。ここにテキストが入ります。
|
1 2 3 4 5 |
<div class="box_style box_style02"> <div class="box_inner"> <p>黒斜の線装飾ボックスです。ここにテキストが入ります。</p> </div> </div> |
青色背景の装飾ボックスです。ここにテキストが入ります。
|
1 2 3 |
<div class="box_style box_style03"> <p>黒色背景の装飾ボックスです。ここにテキストが入ります。</p> </div> |
灰色背景の装飾ボックスです。ここにテキストが入ります。
|
1 2 3 |
<div class="box_style box_style04"> <p>灰色背景の装飾ボックスです。ここにテキストが入ります。</p> </div> |
黒色背景の装飾ボックスです。ここにテキストが入ります。。
|
1 2 3 |
<div class="box_style box_style05"> <p>黒色背景の装飾ボックスです。ここにテキストが入ります。</p> </div> |
テキストが入ります。
|
1 2 3 |
<div class="box_style box_style06"> <p>テキストが入ります。</p> </div> |
テキストが入ります。
|
1 2 3 4 5 |
<div class="box_style box_style07"> <div class="box_inner"> <p>テキストが入ります。</p> </div> </div> |
背景に画像を敷いた7つ目のボックスは、画像を変更するのにCSSの編集が必要です。
または、直接「style=”background-image: url(画像のパス)”」としても大丈夫です。
テキストが入ります。
|
1 2 3 4 5 |
<div class="box_style box_style07" style="background-image: url(http://demo.keni.jp/wp-content/uploads/2018/09/bg-sample.jpg)"> <div class="box_inner"> <p>テキストが入ります。</p> </div> </div> |
テキストが入ります。
|
1 2 3 4 5 6 |
<div class="box_style box_style_blue"> <div class="box_inner"> <div class="box_style_title"><span>タイトルが入ります。</span></div> <p>テキストが入ります。</p> </div> </div> |
テキストが入ります。
|
1 2 3 4 5 6 |
<div class="box_style box_style_green"> <div class="box_inner"> <div class="box_style_title"><span>タイトルが入ります。</span></div> <p>テキストが入ります。</p> </div> </div> |
テキストが入ります。
|
1 2 3 4 5 6 |
<div class="box_style box_style_orange"> <div class="box_inner"> <div class="box_style_title"><span>タイトルが入ります。</span></div> <p>テキストが入ります。</p> </div> </div> |
テキストが入ります。
|
1 2 3 4 5 6 |
<div class="box_style box_style_red"> <div class="box_inner"> <div class="box_style_title"><span>タイトルが入ります。</span></div> <p>テキストが入ります。</p> </div> </div> |
テキストが入ります。
|
1 2 3 4 5 6 |
<div class="box_style box_style_pink"> <div class="box_inner"> <div class="box_style_title"><span>タイトルが入ります。</span></div> <p>テキストが入ります。</p> </div> </div> |
テキストが入ります。
|
1 2 3 4 5 6 |
<div class="box_style box_style_yellow"> <div class="box_inner"> <div class="box_style_title"><span>タイトルが入ります。</span></div> <p>テキストが入ります。</p> </div> </div> |
テキストが入ります。
|
1 2 3 4 5 6 |
<div class="box_style box_style_gray"> <div class="box_inner"> <div class="box_style_title"><span>タイトルが入ります。</span></div> <p>テキストが入ります。</p> </div> </div> |
シンプルに枠の色を変えたい場合は以下を利用できます。
|
1 2 3 4 5 6 7 8 9 10 11 12 |
<div class="p10 bdr">テキストが入ります。</div> <div class="p10 bdr_red">テキストが入ります。</div> <div class="p10 bdr_blue">テキストが入ります。</div> <div class="p10 bdr_green">テキストが入ります。</div> <div class="p10 bdr_yellow">テキストが入ります。</div> <div class="p10 bdr_navy">テキストが入ります。</div> <div class="p10 bdr_orange">テキストが入ります。</div> <div class="p10 bdr_pink">テキストが入ります。</div> <div class="p10 bdr_lime">テキストが入ります。</div> <div class="p10 bdr_aqua">テキストが入ります。</div> <div class="p10 bdr_black">テキストが入ります。</div> <div class="p10 bdr_gray">テキストが入ります。</div> |
なお「noborder」とすることで、枠線を消すこともできます。
|
1 |
<div class="p10 bdr noborder">テキストが入ります。</div> |
吹き出し
賢威8では、吹き出しのスタイルをいくつか用意しています。

ここにセリフが入ります。ここにセリフが入ります。ここにセリフが入ります。ここにセリフが入ります。
|
1 2 3 4 5 6 7 8 9 10 |
<div class="chat_l"> <div class="talker"><b><img class="circle" alt="登場人物A" src="./images/cast01.jpg"></b></div> <div class="bubble_wrap"> <div class="bubble"> <div class="bubble_in"> <p>ここにセリフが入ります。ここにセリフが入ります。ここにセリフが入ります。ここにセリフが入ります。</p> </div> </div> </div> </div> |

ここにセリフが入ります。ここにセリフが入ります。ここにセリフが入ります。ここにセリフが入ります。
|
1 2 3 4 5 6 7 8 |
<div class="chat_r"> <div class="talker"><b><img class="circle" alt="登場人物B" src="./images/cast02.jpg"></b></div> <div class="bubble_wrap"> <div class="bubble"><div class="bubble_in"> <p>ここにセリフが入ります。ここにセリフが入ります。ここにセリフが入ります。ここにセリフが入ります。</p> </div></div> </div> </div> |
登場人物の名前を表示させたい場合は、以下のように記述します。
 笑顔の登場人物A
ここにセリフが入ります。ここにセリフが入ります。ここにセリフが入ります。ここにセリフが入ります。
|
1 2 3 4 5 6 7 8 9 10 |
<div class="chat_l"> <div class="talker"><b><img class="circle" alt="登場人物A" src="./images/cast01.jpg">笑顔の登場人物A</b></div> <div class="bubble_wrap"> <div class="bubble"> <div class="bubble_in"> <p>ここにセリフが入ります。ここにセリフが入ります。ここにセリフが入ります。ここにセリフが入ります。</p> </div> </div> </div> </div> |
 笑顔の登場人物B
ここにセリフが入ります。ここにセリフが入ります。ここにセリフが入ります。ここにセリフが入ります。
|
1 2 3 4 5 6 7 8 |
<div class="chat_r"> <div class="talker"><b><img class="circle" alt="登場人物B" src="./images/cast02.jpg">笑顔の登場人物B</b></div> <div class="bubble_wrap"> <div class="bubble"><div class="bubble_in"> <p>ここにセリフが入ります。ここにセリフが入ります。ここにセリフが入ります。ここにセリフが入ります。</p> </div></div> </div> </div> |
複数の人物が話している様子を表現する場合は、以下のようにクラス「together」を追加します。
 笑顔の登場人物A
 笑顔の登場人物A
ここにセリフが入ります。ここにセリフが入ります。ここにセリフが入ります。ここにセリフが入ります。
|
1 2 3 4 5 6 7 8 9 10 |
<div class="chat_l together"> <div class="talker"><b><img class="circle" alt="登場人物A" src="./images/cast01.jpg">笑顔の登場人物A</b><b><img class="circle" alt="登場人物A" src="./images/cast01.jpg">笑顔の登場人物A</b></div> <div class="bubble_wrap"> <div class="bubble"> <div class="bubble_in"> <p>ここにセリフが入ります。ここにセリフが入ります。ここにセリフが入ります。ここにセリフが入ります。</p> </div> </div> </div> </div> |
 笑顔の登場人物B
 笑顔の登場人物B
ここにセリフが入ります。ここにセリフが入ります。ここにセリフが入ります。ここにセリフが入ります。
|
1 2 3 4 5 6 7 8 |
<div class="chat_r together"> <div class="talker"><b><img class="circle" alt="登場人物B" src="./images/cast02.jpg">笑顔の登場人物B</b><b><img class="circle" alt="登場人物B" src="./images/cast02.jpg">笑顔の登場人物B</b></div> <div class="bubble_wrap"> <div class="bubble"><div class="bubble_in"> <p>ここにセリフが入ります。ここにセリフが入ります。ここにセリフが入ります。ここにセリフが入ります。</p> </div></div> </div> </div> |
また、以下のようなスタイルもあります。
 笑顔の登場人物A
ここにセリフが入ります。ここにセリフが入ります。ここにセリフが入ります。ここにセリフが入ります。
|
1 2 3 4 5 6 7 8 9 10 |
<div class="chat_l chat_style02"> <div class="talker"><b><img class="circle" alt="登場人物A" src="./images/cast01.jpg">登場人物A</b></div> <div class="bubble_wrap"> <div class="bubble"> <div class="bubble_in"> <p>ここにセリフが入ります。ここにセリフが入ります。ここにセリフが入ります。ここにセリフが入ります。</p> </div> </div> </div> </div> |
 笑顔の登場人物B
ここにセリフが入ります。ここにセリフが入ります。ここにセリフが入ります。ここにセリフが入ります。
|
1 2 3 4 5 6 7 8 |
<div class="chat_r chat_style03"> <div class="talker"><b><img class="circle" alt="登場人物B" src="./images/cast02.jpg">登場人物B</b></div> <div class="bubble_wrap"> <div class="bubble"><div class="bubble_in"> <p>ここにセリフが入ります。ここにセリフが入ります。ここにセリフが入ります。ここにセリフが入ります。</p> </div></div> </div> </div> |

